
Introduction
RaceClocker is a software tool designed for manually timing of all kinds of races. Although it works great on touch screen or mouse controlled devices like phones, tablets or laptops, in some cases it is preferable to use physical controls rather than a touch screen. In manual race timing, there can be high-pressure moments or tricky conditions where using a physical button can significantly improve the accuracy and smoothness of the timing experience.
By connecting a simple wired or wireless button to your device, you can time key moments more accurately and reliably. This function is particularly useful when a timekeeper is working alone and needs to keep their eyes on the race instead of on a screen. Or for when the participants themselves physically interact with a finish button - like in swimming or beach sprint rowing.
Combining hardware timing with RaceClocker
All sports and timing modes in RaceClocker support hardware timing, and a range of hardware supported options is described in this article. Use whatever you prefer and what works best for your race setup. The various types of hardware timing are: 1) using the laptop or computer keyboard, 2) using a standalone hardware button or 3) creating a custom button board for specific use cases. All button support can be used with all different timing modes.
#1 - Using laptop keyboard timing
When timing a race on a laptop or desktop computer, using your keyboard to time participants can be easier and faster than using mouse or trackpad. When timing at split points or at the finish, you can use the spacebar to create a timestamp or use the number keys to type in participants' bib numbers, either using your keyboard or a separate numeric keypad.
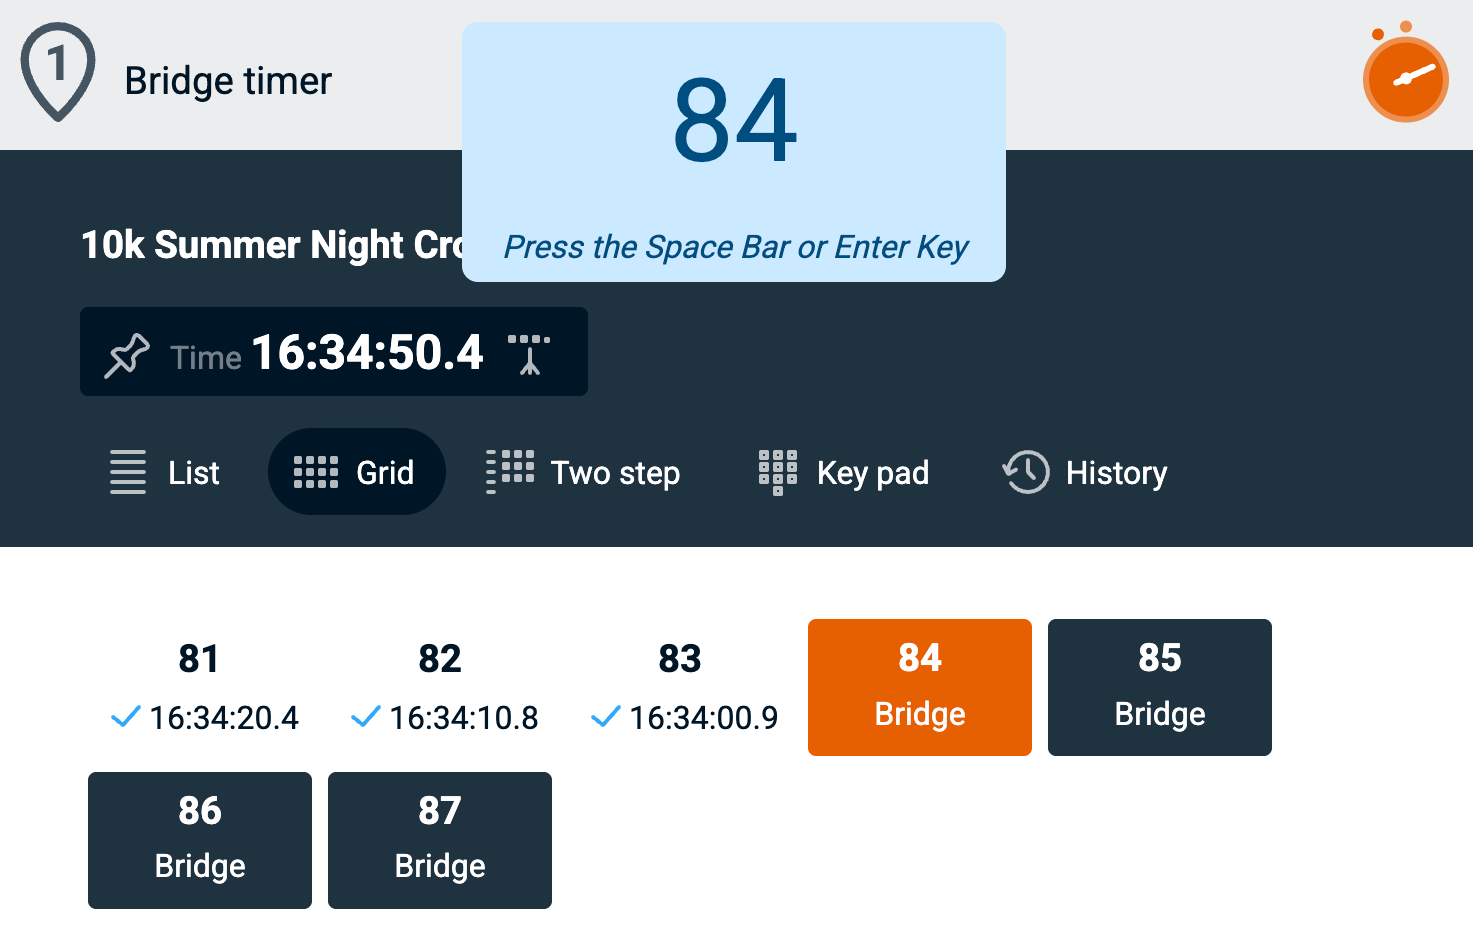
In List, Grid and Keypad Timing modes, you can type in a bib number to activate the matching timing button. If the button is not in the current view, the UI will scroll to it. The button then becomes ‘hot’ (colored orange) and reacts on a spacebar press in the same way as it being pressed or clicked with a mouse.
In Two Step timing mode, the key feature is that you can create multiple (unassociated) timestamps when you hit the spacebar. For example if three athletes pass the finish line very close to each other. You, or someone else on another device, can then assign bib numbers to the correct timestamps at a later stage. This association can also be done via the keyboard by typing bib numbers and confirm them with the Enter key. This allows you to make exact time stamps and significantly reduces the margin for error.
#2 - Using a wired or wireless button
A wired USB or wireless bluetooth button can be used in exactly the same way as the spacebar on your laptop. All timing modes work in the same way as described above, but instead of working on a laptop, you can also connect such a button to your phone or tablet.
This means that if you are timekeeping alone, you can manage the timing better without compromising accuracy. Another big added value of using a wireless button is that, when timekeeping together, one timekeeper can keep their eyes on the race at all times while another assists them by adding the correct bib numbers to the corresponding timestamps. An example of using a FLIC button in 2 step mode is below:
Example with FLIC button
You can use any wireless or wired remote button, as long as it’s configurable to behave as a HID (Human Interface Device) and a keystroke code can be assigned to your button. For race timing this should be the spacebar function. An example of a wireless button is the FLIC button. It can be used with all types of devices and connects via bluetooth.
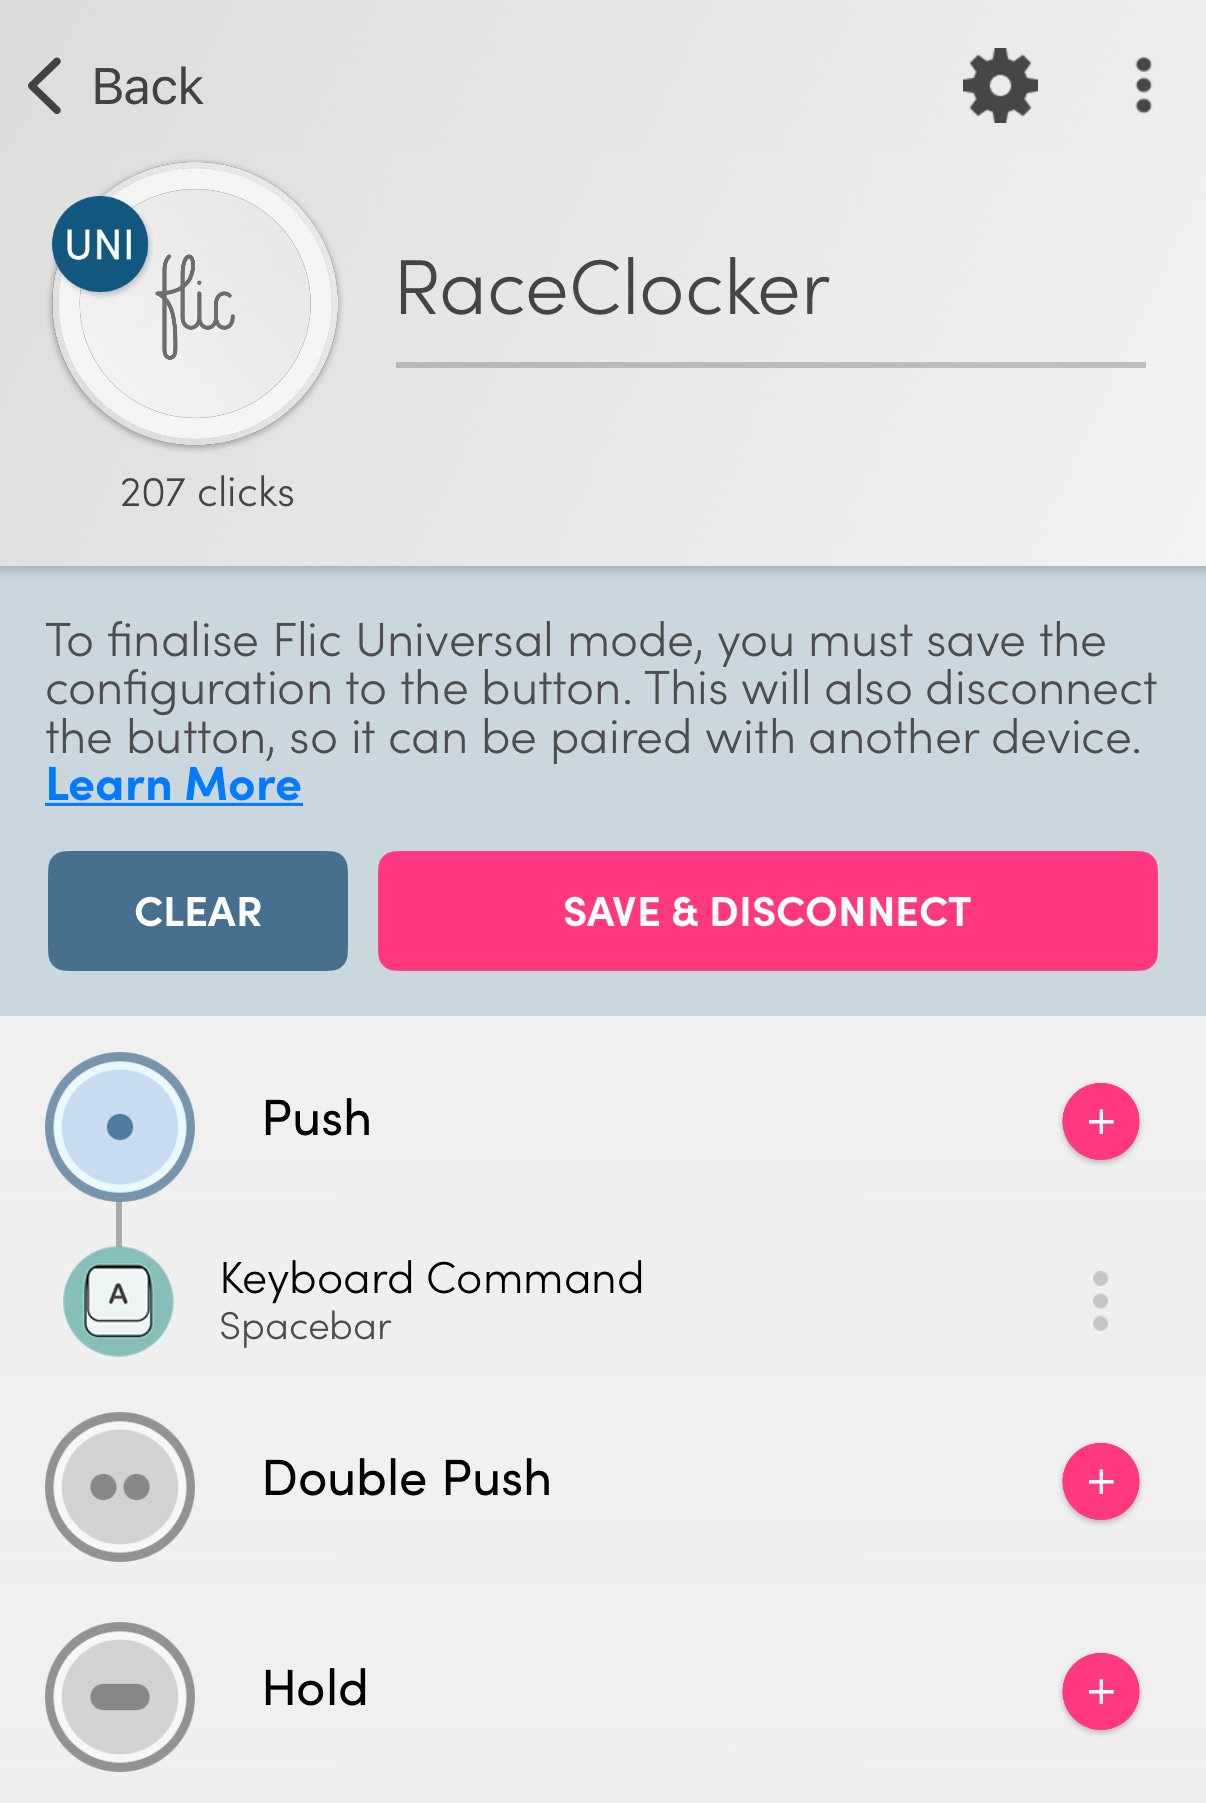
Start with pairing the button with the FLIC app on your phone. Once connected, assign the correct ‘keystroke’ function (spacebar) to your button and make the button behave as a HID (Human Interface Device) - in the FLIC app that’s done by setting the button in ‘Universal mode’.

Configuration of FLIC button in the companion app Then connect the button via bluetooth to your timing device, for example a phone. Note that you only want to do that during timing, as the regular soft keyboard of your phone will be bypassed. Once set up, check if the button behaves as expected and if clicks are being received consistently, without delay and also at the distance to your device you’re expecting to operate at.
If everything works as expected, you are good to go. Keep in mind that the browser window with the RaceClocker timing app remains in the foreground (or focused) in order to receive keyboard events.
An example of the list timer mode with FLIC button. First the approaching participant is highlighted, and the button is pressed to make the time stamp.
DYI timing by the race participant
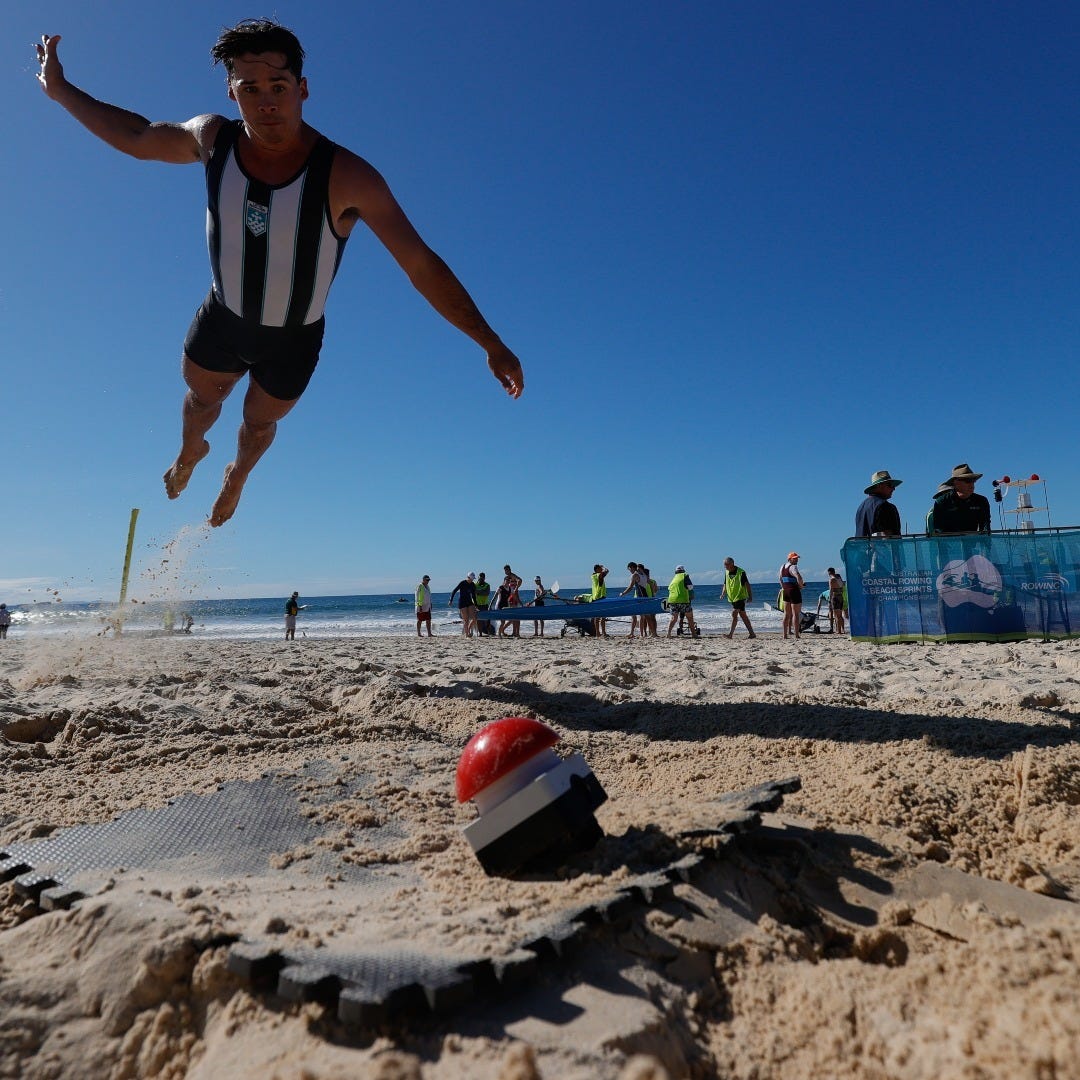
Another example of physical buttons connected to RaceClocer is where race participants themselves ‘finish’ with the push of a button. This is common in sports like beach sprints in coastal rowing or obstacle courses like Ninja Warrior races.
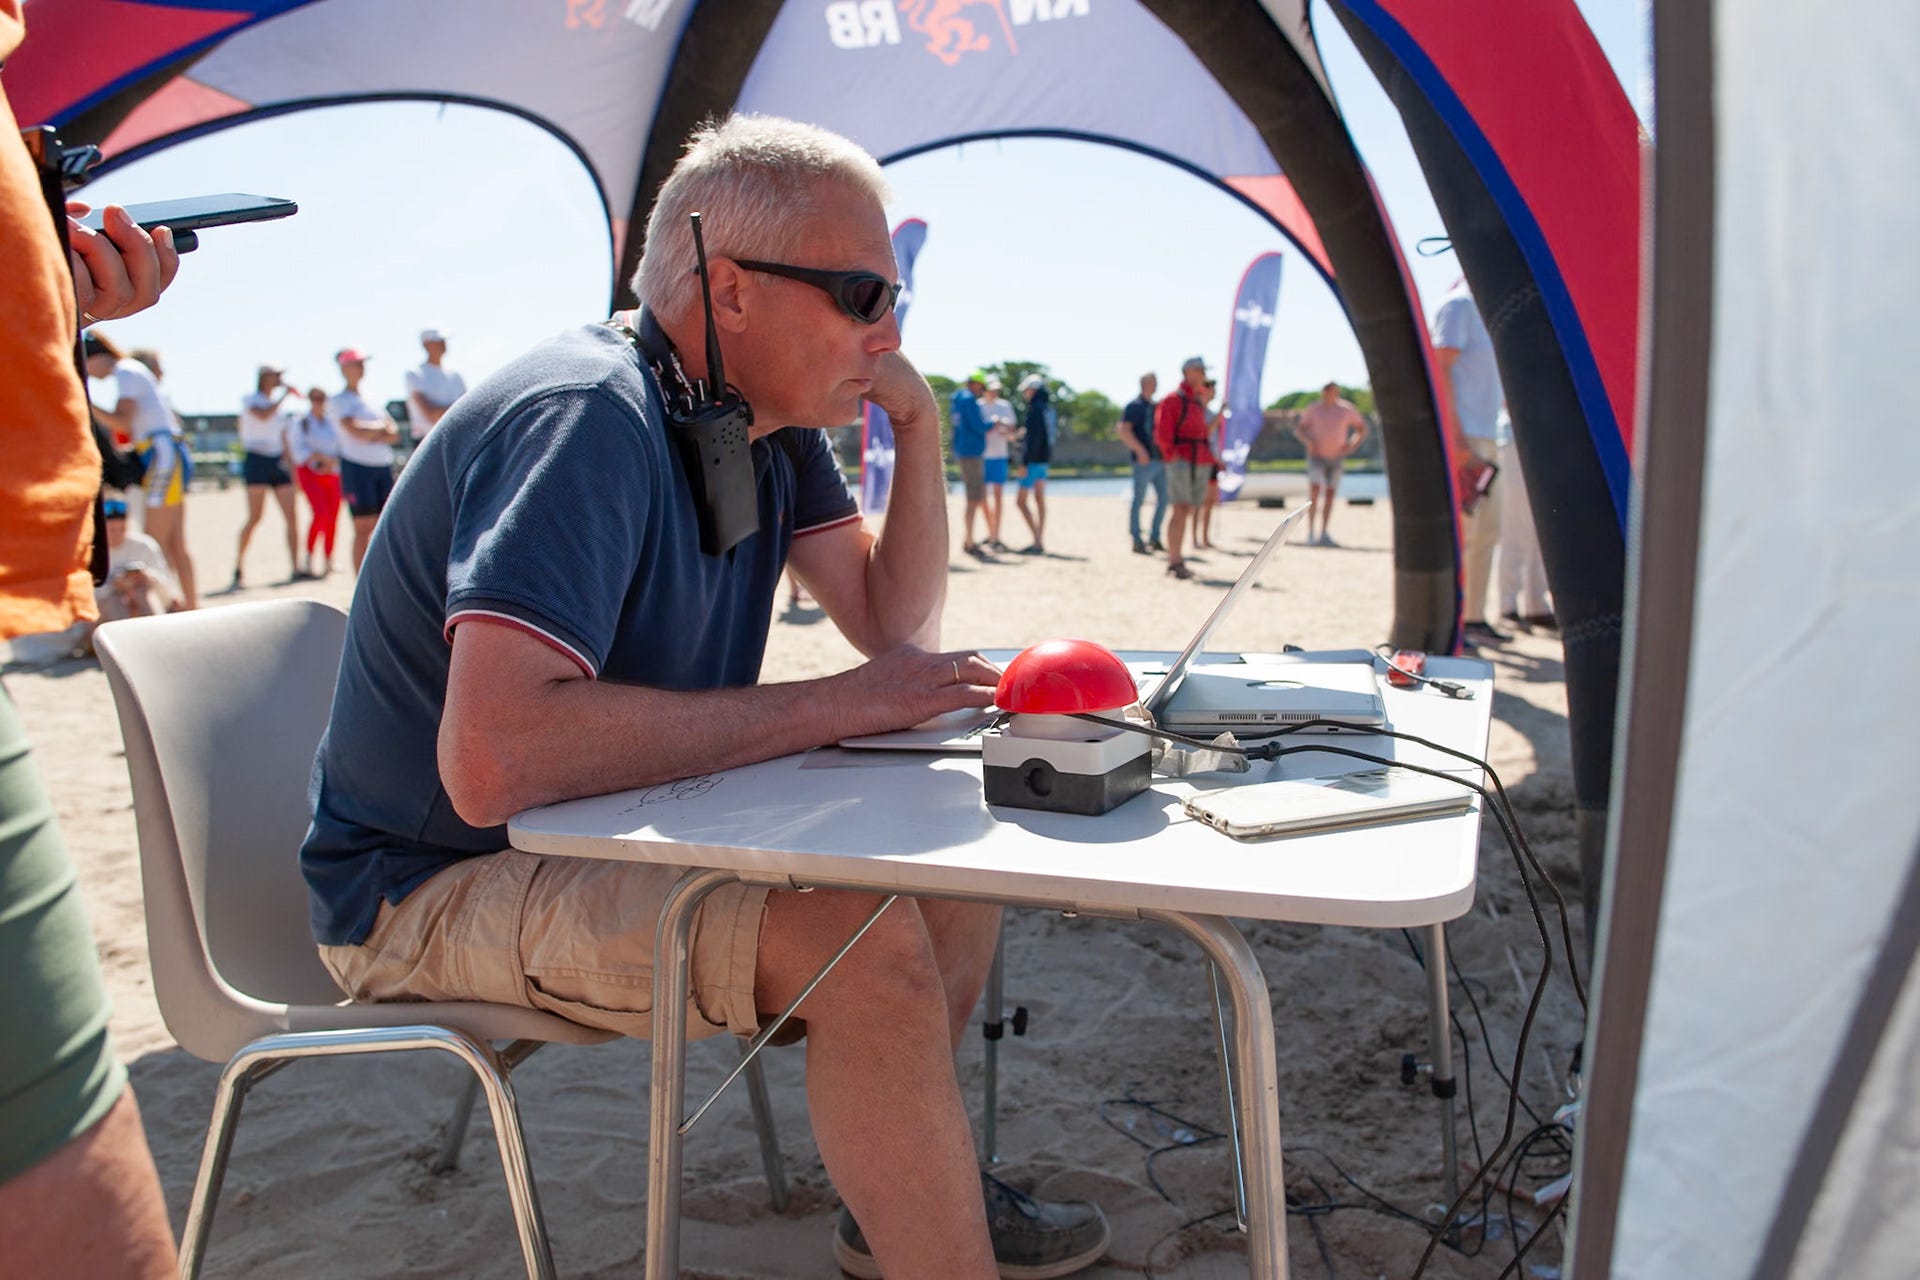
In these races, there is no finish line; athletes are finished when they stop the clock. Here’s an example of a USB ‘emergency’ button that were recently applied in a beach sprint race, connected to Raceclocker. The keycode of that particular device can be set using this web utility.
#3 - Advanced hardware timing
More advanced is the option to time a race with a range of single buttons or a custom ‘button board’ connected to a single device. This works differently than above as each button (for example in a custom keypad array) will time a single race participant directly. Instead of setting the spacebar as keycode, you can program buttons to use keycodes 150 to 180.

These can be used to time the first 30 participants of a race using individual buttons. For example, if the first button, connected to keycode 150, is pressed, the first participant's time will start, and so on. Keycodes 150 to 180 (0x96 - 0xB4) are not used for standard keyboard actions. Note that it will likely require some custom programming to set that up.
It feels like a stopwatch!
If you like the ‘feel’ of manual timing with a stopwatch, this can be achieved! An active RaceClocker user in our community times their races using a FLIC button, and didn’t want to risk losing the small button while timing. They designed an open-source 3D-printable file for a holder with a string attachment for your FLIC button. This means that the FLIC button can be used for timing with full functionality, so there's no need to worry about it getting lost or damaged.
If you would like to try this for yourself, you can find the files (.stl) here:

Enjoy!
Good luck with your upcoming races! If you are new to RaceClocker, make sure to create a free account on RaceClocker.com and start exploring. We are constantly working to develop our tools to provide the best possible user experience, so please get in touch if you have any questions or comments. #Happytiming
Very cool, would love to see an example where the button triggers both Raceclocker and a finish line hooter